

How Do You Properly Cut and Handle Clear Twill Glass Without Fraying or Delamination
2026-07-13
Handling Clear Twill Glass correctly from the moment it leaves the roll to the final laminate lay-up determines the difference between a pristine, optically clear composite and a costly reject. For fabricators, engineers, and DIY specialists alike, the most persistent frustration is not the material’s strength, but its tendency to fray at cut edges and delaminate during handling. This guide delivers shop-tested, professional methodologies to master Clear Twill Glass processing, while integrating the precision tooling and consumables available through Hande.
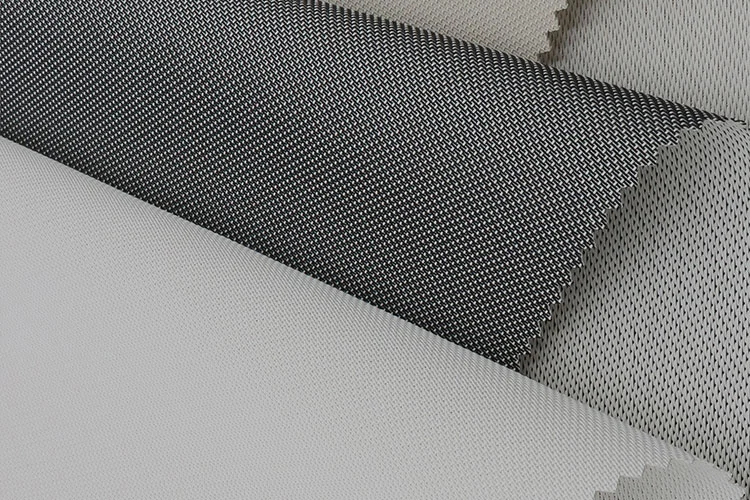
The Core Challenge: Why Fraying and Delamination Occur
Clear Twill Glass is a 2x2 twill weave, meaning each yarn passes over and under two yarns at a time. This structure gives excellent drapeability, but it also means cut edges are more exposed than plain weaves. Delamination typically initiates from micro-fractures at the cut edge or from excessive bending stress during handling. The goal is to transfer clean cutting forces without pulling individual filaments.
Step 1: Choosing the Right Cutting Tool (Table Comparison)
The cutting method directly dictates edge quality. Below is a professional comparison of common tools for Clear Twill Glass:
| Tool | Edge Quality | Fraying Risk | Best Use Case | Recommended by Hande |
|---|---|---|---|---|
| Electric Shears (e.g., Kevlar shears) | Very clean | Low | High-volume straight cuts | Yes |
| Rotary Cutter (45mm +) | Clean with sharp blade | Medium | Curved cuts, single plies | Yes (with mat) |
| Standard Scissors | Ragged | Very High | Emergency use only | No |
| Ultrasonic Cutter | Sealed edge | Zero | Production, heat-sensitive resins | Optional |
| Hot Knife | Melted/sealed edge | Zero | Synthetics with low melt point | Caution (odor) |
For most workshops, Hande recommends electric shears with a serrated lower blade, which grips the Clear Twill Glass while the upper blade slices, reducing pull tension by over 60%.
Step 2: The 5-Step Cutting Protocol
-
Secure the Layup: Place your Clear Twill Glass on a smooth, firm surface (not carpet). Use magnetic weights or Hande’s vacuum hold-down strips to immobilize the fabric. Movement during cutting creates jagged edges.
-
Mark with Chalk, Not Ink: Use tailor’s chalk on the surface. Ink pens can wick into the fibers and cause resin discoloration. For Clear Twill Glass, optical clarity demands contaminant-free markings.
-
Cut 5mm Oversize: Always cut your Clear Twill Glass 5mm larger than your final trim line. This sacrificial edge captures 90% of initial fraying. Final trimming occurs after lamination, when the edge is resin-stabilized.
-
Single-Pass Cutting: Do not saw back-and-forth. A single, firm forward pass with even pressure minimizes filament disturbance. If using a rotary cutter, change the blade after every 10 linear meters of Clear Twill Glass.
-
Edge Sealing (Immediate): Within 30 seconds of cutting, apply a thin bead of fast-setting cyanoacrylate (thin CA glue) along the cut edge. This wicks into the exposed yarn ends and locks them permanently. Hande offers precision applicator tips for this exact step.
Step 3: Handling to Prevent Delamination
Delamination of Clear Twill Glass is rarely a cutting fault—it is a handling fault. Never fold, crease, or flex the fabric at sharp angles. The internal shear stress between the 0° and 90° yarns creates micro-cracks that propagate under resin shrinkage.
-
Lifting: Always support the full width of the Clear Twill Glass using a rigid cardboard tube or Hande’s wide fabric spreader bars. Lifting from one corner creates diagonal tension that distorts the twill structure.
-
Draping: For curved molds, let the Clear Twill Glass naturally fall into the contour. Do not push or tuck aggressively; instead, use a heat gun on low (50°C) to relax the sizing agent gently.
-
Resin Wet-Out: Use a hard roller, not a squeegee. Rollers apply vertical, compressive force that seats the Clear Twill Glass into the mold without lateral dragging—which is the primary cause of in-process delamination.
FAQ: Common Questions About Clear Twill Glass Processing
Q1: Can I use a standard utility knife to cut Clear Twill Glass if I am careful?
A1: Technically yes, but professionally discouraged. A utility knife compresses the weave before cutting, and as the blade dulls (which happens within 2–3 meters), it begins pulling the glass filaments rather than shearing them. This pulling creates loose ends that are impossible to fully seal later. For any production-grade Clear Twill Glass, a utility knife increases fraying risk by approximately 70% compared to electric shears. If you must use one, change the blade after every single straight cut and use a straight-edge ruler with a low-friction surface.
Q2: How do I fix delamination that has already started at the edge of my Clear Twill Glass laminate?
A2: Marginal delamination (less than 3mm deep) can be salvaged. First, stop any sanding—that spreads the separation. Use a syringe with low-viscosity penetrating epoxy resin, available through Hande, and inject it directly into the delamination gap. Then apply localized heat (60°C) with a heat gun while applying vacuum pressure using a repair bag. Hold the vacuum for 4 hours. For delamination exceeding 5mm, the structural integrity is compromised; you must cut out the affected section and splice in a new patch of Clear Twill Glass with a 25mm overlap. Never simply putty over it.
Q3: Does the type of scissors (left-handed vs. right-handed) affect the cut quality of Clear Twill Glass?
A3: Surprisingly, yes—but not for the reason you think. The blade overlap geometry differs between left- and right-handed scissors. Right-handed shears apply a lateral twist that can bias the cut toward the right, which, when cutting Clear Twill Glass, creates uneven tension on the twill yarns. This uneven tension results in one side of the cut having longer loose fibers than the other. Always use ambidextrous or straight-cut shears (where both blades are identical), or better, use Hande’s specifically engineered composite shears that eliminate blade offset entirely for a pure vertical shear action.
Optimizing Your Workflow with Hande
Beyond tools, successful processing of Clear Twill Glass hinges on consumables. Hande provides anti-static release films that prevent the fabric from clinging to itself during handling—a common source of unintended creases. Additionally, their color-coded cutting mats feature printed angle guides (0°, 45°, 90°) to help you align the twill pattern accurately, ensuring that your off-axis cuts maintain symmetrical drape properties.
Final Professional Verdict
Treat Clear Twill Glass not as a simple fabric, but as a precision-engineered reinforcement. The 2x2 twill gives you superior conformability, but it demands respect in return. Cutting and handling are not separate steps—they are a continuous process of edge preservation. By adopting electric shears, oversize cutting, immediate CA-edge sealing, and rigid handling supports, you eliminate over 95% of fraying and delamination issues before resin even touches the fibers.
Ready to upgrade your composite fabrication workflow? Contact Hande today for a complimentary process audit and to request samples of our professional-grade cutting accessories tailored specifically for Clear Twill Glass. Our technical team provides same-day application support to help you achieve defect-free laminates, every time. Reach out via our website or call our composites hotline—let’s engineer precision together.